 I wish you all a great Saturday! There are two things about which I am particularly pleased today: it's Saturday, which means the weekend and there is also a new tutorial at Stempeleinmaleins.
 ***
I wish all of you a wonderful Saturday! There are two things I'm happy about today. 1) it's Saturday and this weekend means and 2) we have another tutorial for you at Stempeleinmaleins.
I have for you a tutorial for a "pocket card", a greeting card with an integrated plug-in bag that you can give wonderful little things.
***
I want to share my tutorial for a different kind of "pocket card". It's a greeting card with a pocket inside to give away a little gift with your greetings.
your needs:
cardstock, 29 x 15.5 cm, 12 x 18 cm
stamp designs
cardstock for card design, pattern paper
wide band, about 2.5 x 60 cm
velcro dots or small magnets
glue, scissors , bone folder
Garnish Border Punch, paper shaper, various embellishments
***
You need:
two pieces of cardstock, pattern 29 x 15.5 cm, 12 x 18 cm
stamped images
card stock and paper for decoration
a wide ribbon about 2.5 cm x 60 cm
mini-magnets or hook and loop dots
glue, scissors, bonefolder
border punches, punches, embellishments
 The base map is from a piece of card stock with the dimensions 29 x 15.5 cm. This is folded at 11.5 cm, 14 cm, 25.5 cm and 28 cm.
 ***
The card's base is made from a 29 cm x 15.5 cm piece of card stock. Fold at 11.5 cm, 14 cm, 25.5 cm and 28th stamped

The inner and outer sides of the card on your mood and / or paste with pattern paper. The tape I have on the front of each card stuck under the theme so this holds good.
***
You can stamp / decorate the inside and outside of your card like you want and / or use pattern paper. I glued the ribbon on the outside behind the images to be sure it would last. Cut
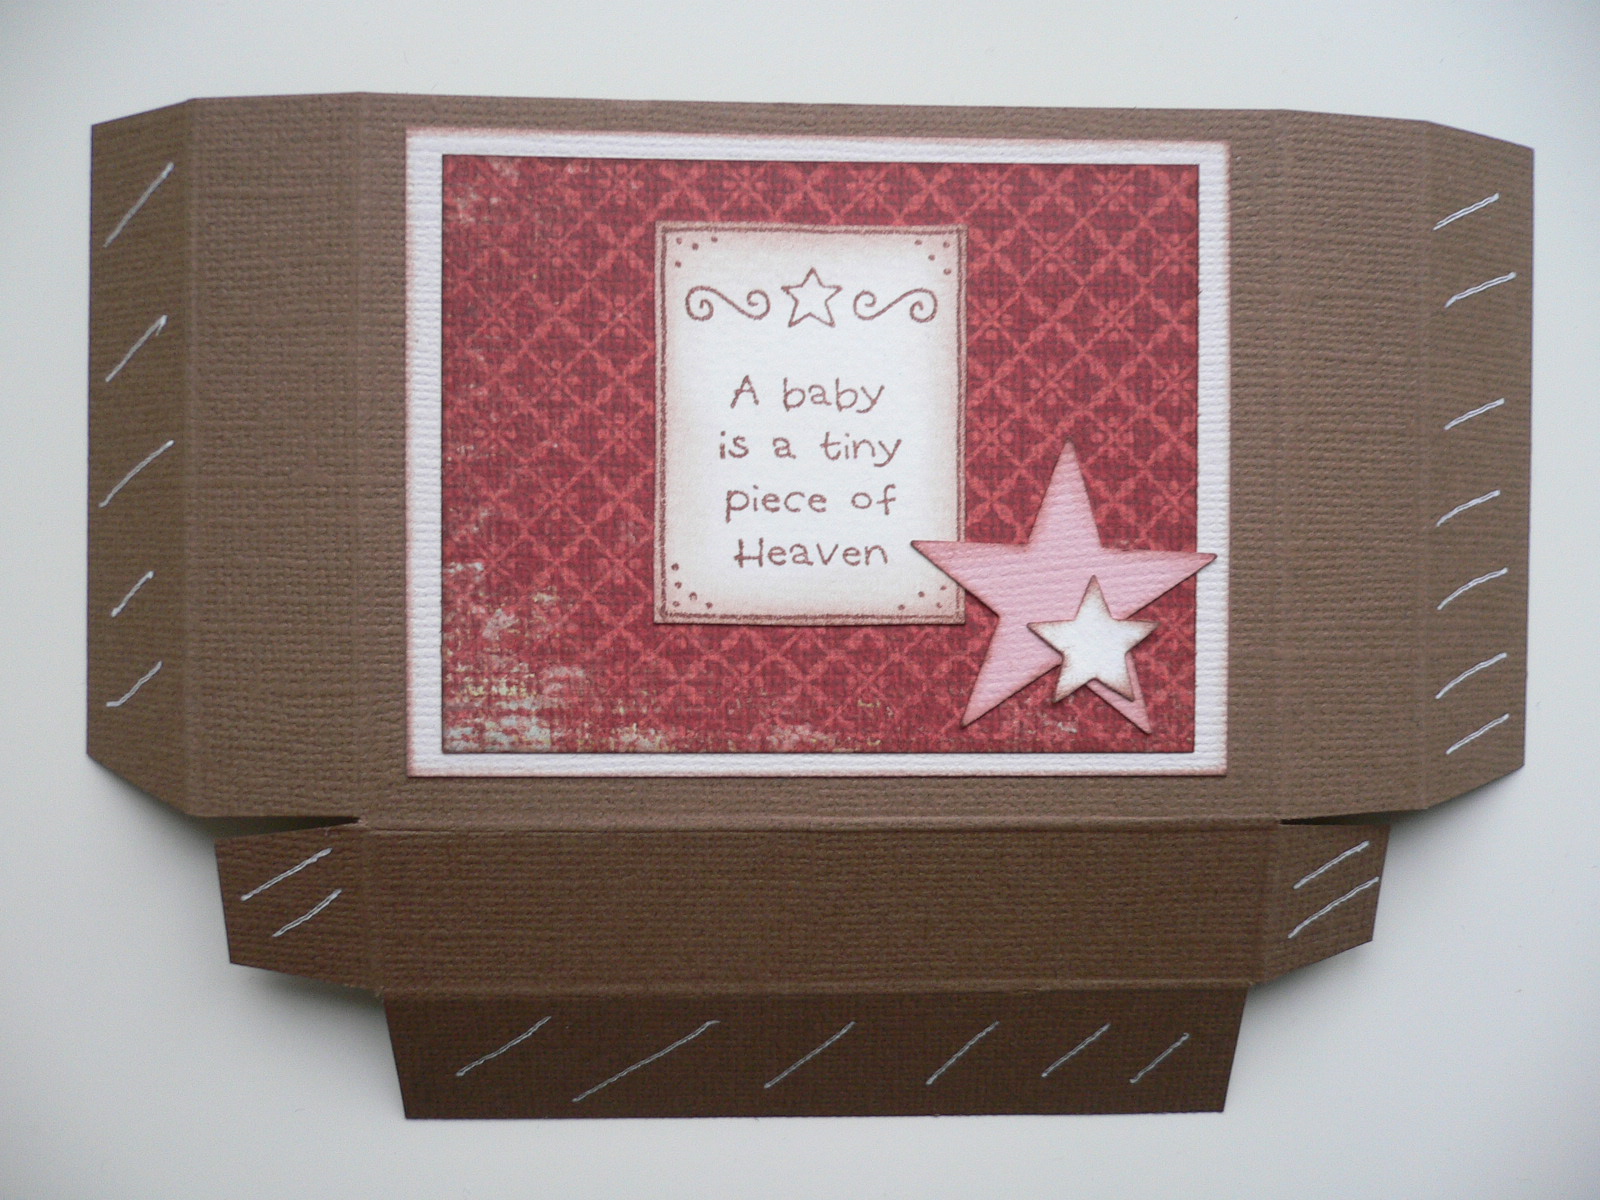 For the bag a piece of card stock with the dimensions 12 x 18 cm and with the long side at 2 cm, 4 cm, 14 cm and fold 16 cm, on the short side at 8 cm and 10 cm. Following the submission cut the glue tabs. The bag at will stamp on scrap paper or bonded to them.
 ***
For the pocket you need a 12 cm x 18 cm piece of card stock. Score at 2 cm, 4 cm, 14 cm and 16 cm on the long side and on the short side at 8 cm and 10 cm. Cut the flaps like glueing shown on the picture. You can pocket stamp or use to decorate the paper pattern.
 After the complete design of glued pocket. First you have to stick to the two small plates, so that a pocket. The white dashed areas are the joint surfaces to adhere the pocket to the card.
 ***
After that you can glue the pocket together. Please glue the small flaps first to get the pocket. The marked white spaces are the spaces to add glueing the pocket to the card.
 ... and filled the looks like this ...
 ... and filled the looks like this ...
This bag your stick down firmly on the right inside of the card. The left side I have kept for personal greeting.
***
Now glue the pocket to the card's right inside. The left inside is reserved for a personal greeting.
Now glue the pocket to the card's right inside. The left inside is reserved for a personal greeting.
Velcro dots or mini-magnets can still be applied in addition to the tab, the map includes beautiful though.
***
If you want you can add mini-magnets or hook and loop dots to the card's flap to get a better closure.
***
If you want you can add mini-magnets or hook and loop dots to the card's flap to get a better closure.
provides closed loop with the final "pocket card" like this: ***
With a ribbon finished the "pocket card" looks like this:

With a ribbon finished the "pocket card" looks like this:
. .. and here is another example of the "Winter Greetings" ...
***
... and here another one as "wintery greeting" ...
... and here another one as "wintery greeting" ...
 ... with a hot chocolate and a few mini-marshmallows ...
 ***
... with a hot chocolate and some mini marshmallows ...

I hope you like this little Pocket card.
***
I hope you like this kind of "pocket card".
Eure Simone
And here are the pocket cards of the team:
*** And here are the "pocket cards" from the team:
*** And here are the "pocket cards" from the team:


0 comments:
Post a Comment